Trial by Fire
Glaze Matching in Architectural Ceramics
Glazed ceramic materials such as terra cotta, tile, and even bricks, often feature prominently in historic architecture. The idea of firing clay coated with minerals that produce a glass-like surface is as old as the Romans (actually even older). While inherently durable, these materials can suffer deterioration from moisture, waterborne salts, and other forces. When glazed architectural ceramics reach the point of no return, replacement may be the only option.
Matching the color, sheen, and texture of original glazes can be a daunting task complicated by the composition of the original glaze and clay body, the glaze application method, the type of kiln, and firing temperatures and times. The most common hurdle in developing a good glaze match is the composition of the original glaze. Historic glazes often used toxic materials such as barium (flux), cobalt (deep blues), chromium (greens), cadmium (bright reds/oranges), and lead (metallic colors and flux). While safer substitutes are available today, they make the process of matching the original glaze all the more difficult.
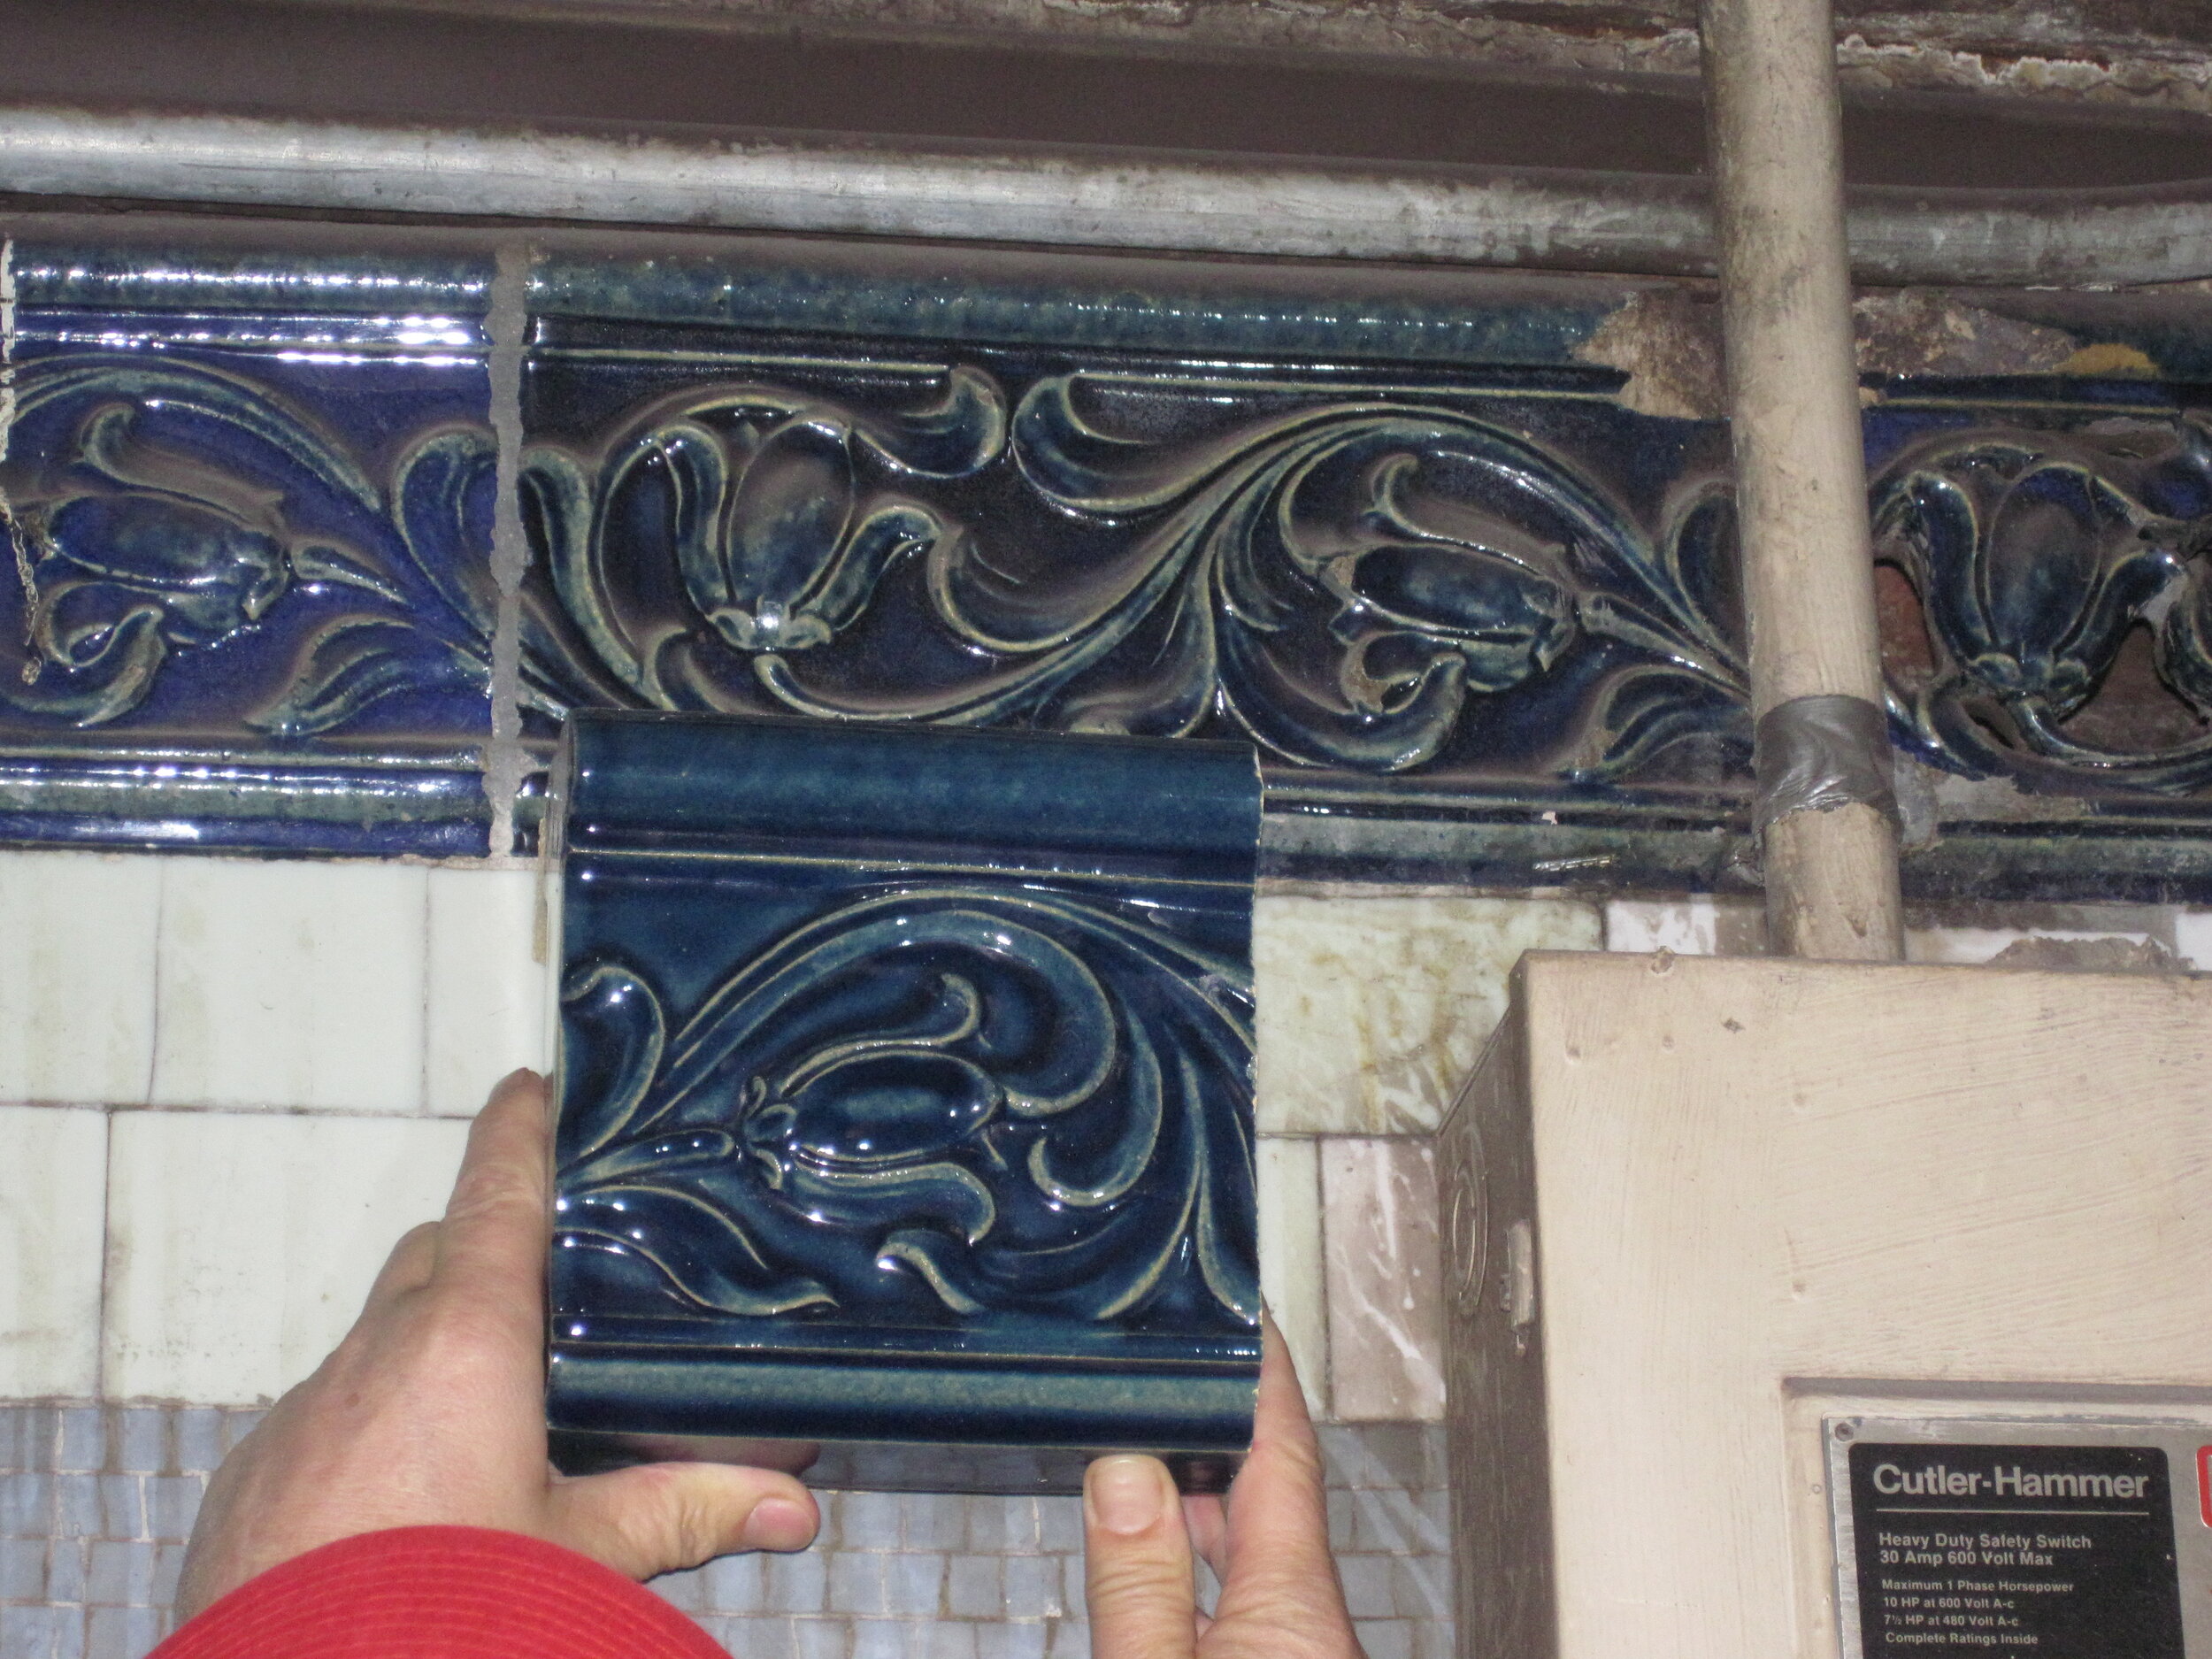
Figure 1: Matching the color and translucency of this glaze was complicated by the use of cobalt and lead in the original.
Clay presents another potential complication. Sometimes the color of the clay is important as with thin or translucent glazes that allow the clay body to show through. In other circumstances, impurities in the clay can react with components of the glaze, affecting its color. Historically, clays were locally sourced. While that tradition continues today with large brick manufacturing plants and some small potteries, clays are more often procured from a handful of mass-produced sources. Finding a good glaze match may mean starting with the right clay.
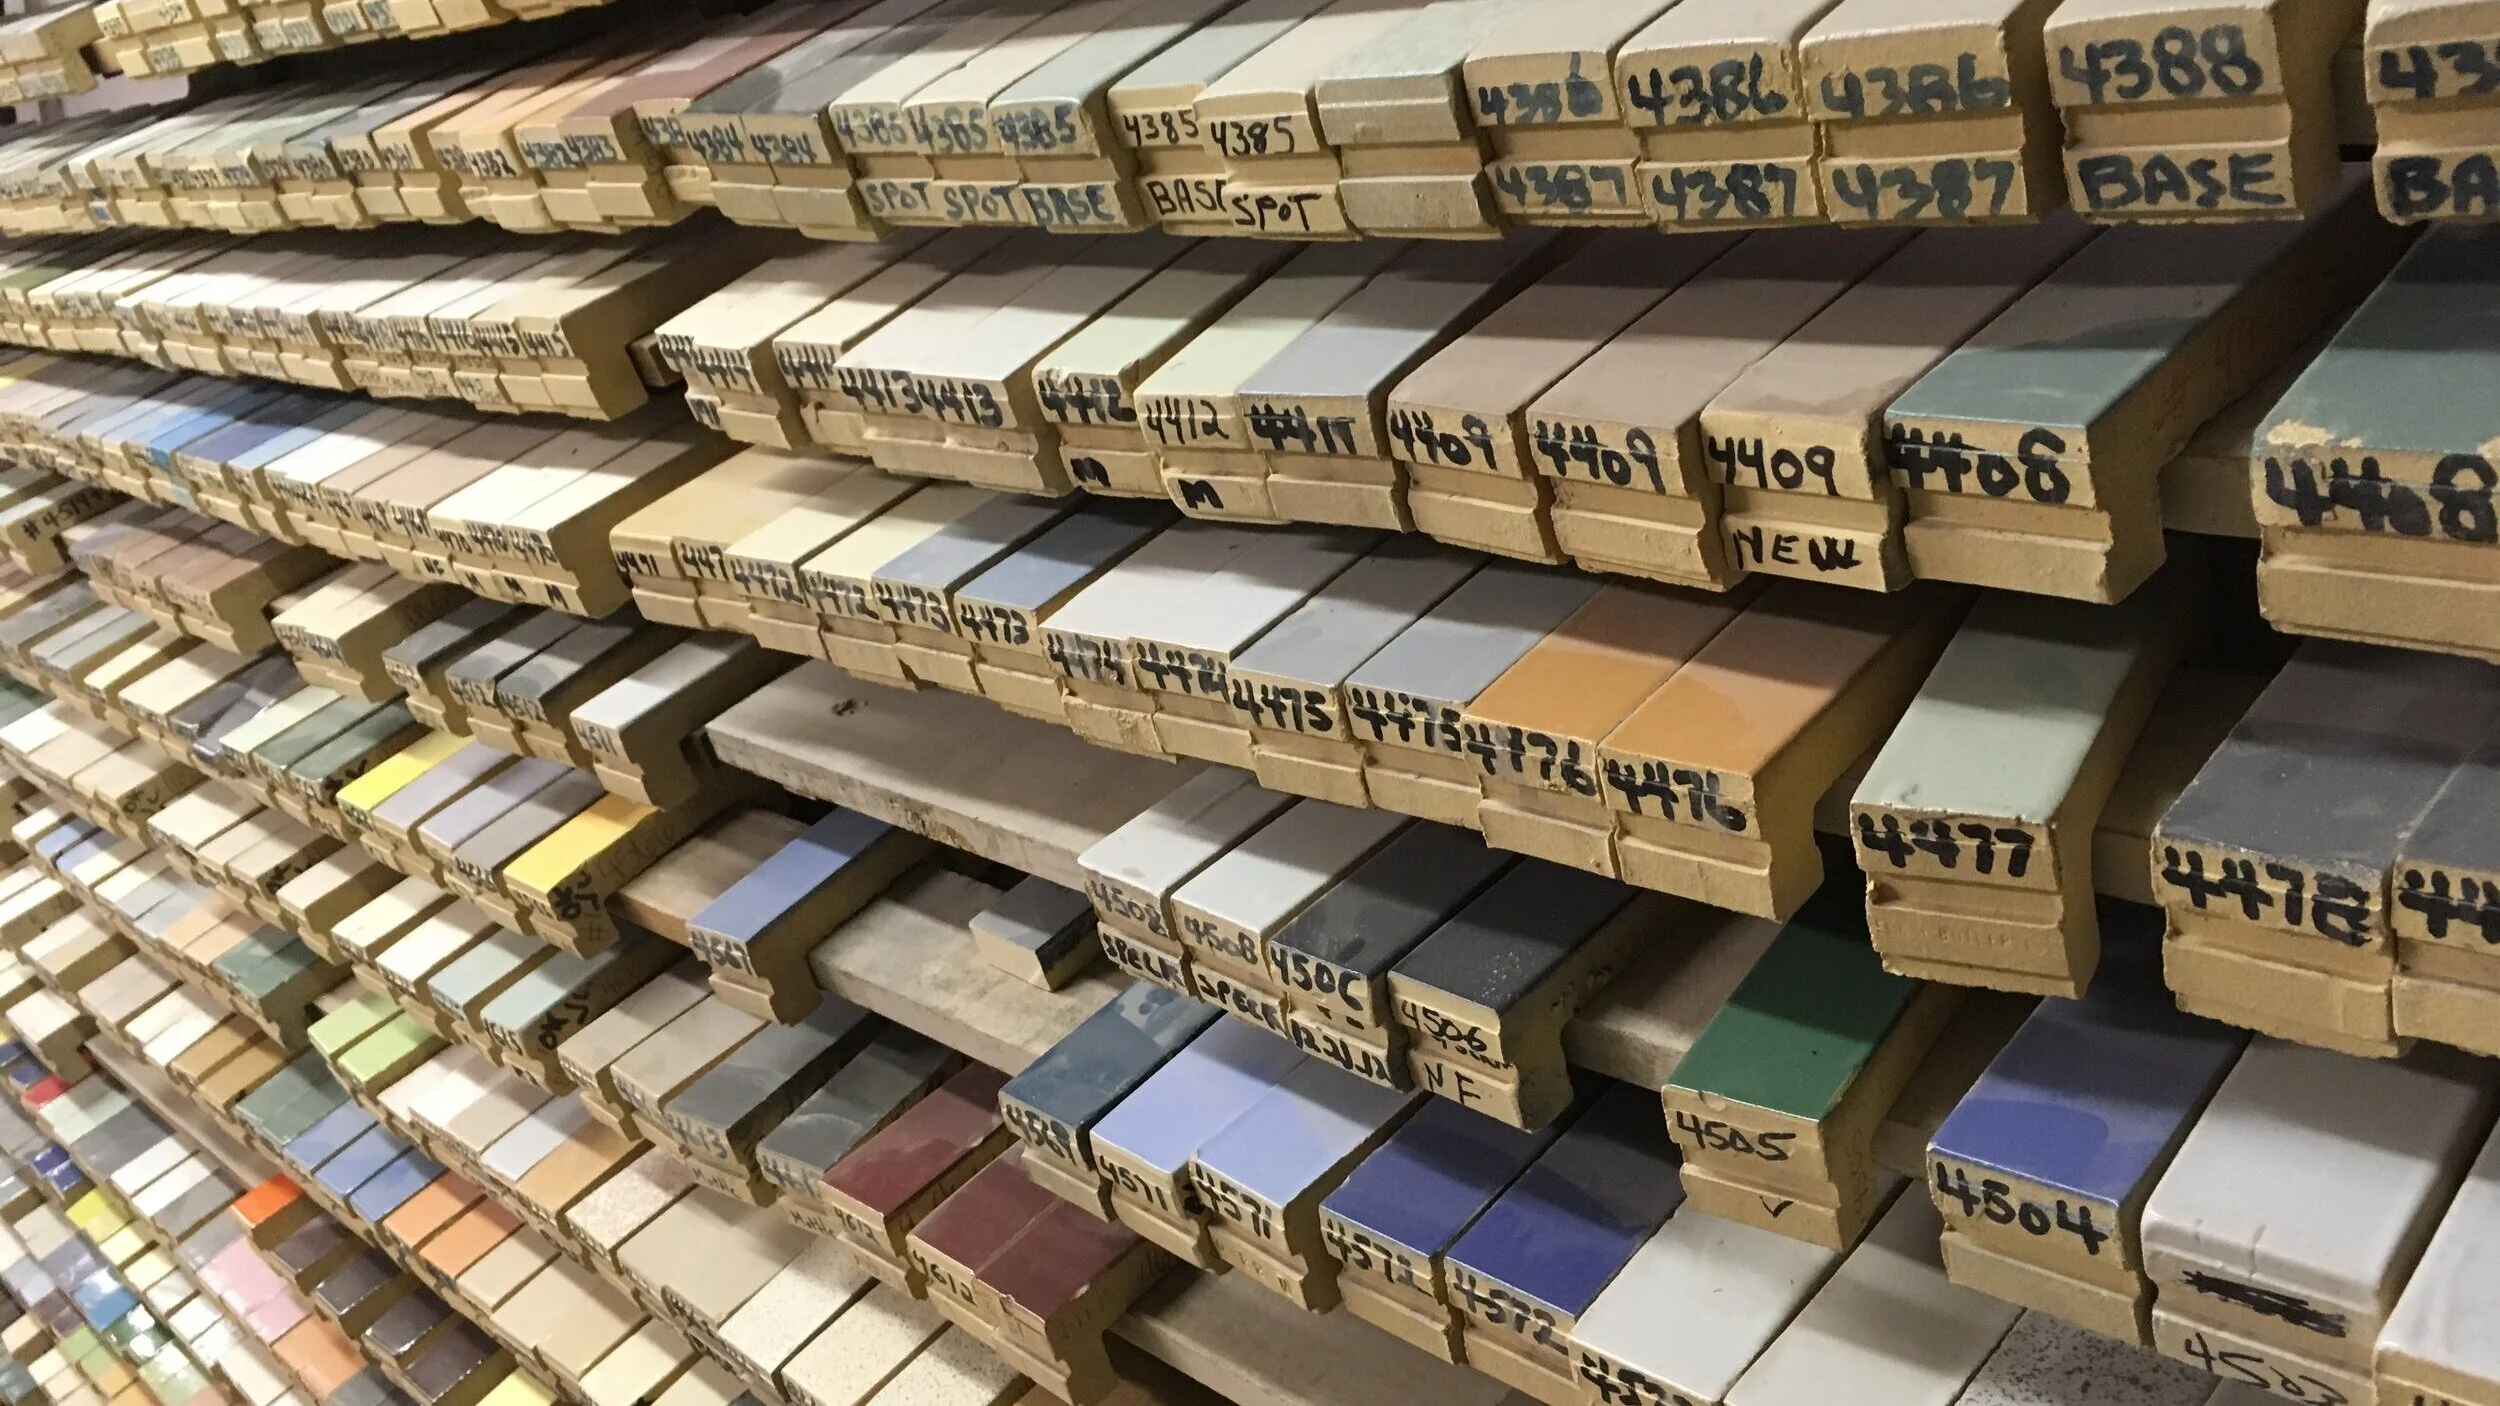
Glaze trials are the most important step in glaze matching. Trial is an appropriate word since the process can involve a considerable amount of trial and error. A glaze before firing looks nothing like the finished product. Understanding what happens when a glaze melts at high temperatures or when multiple raw materials are combined in a glaze is part art and part science. Glaze chemists and artisans keep cookbooks full of recipes with physical samples to help guide them through the process, carefully noting ingredients as well as firing times and temperatures. Recipes must be continuously adjusted to account for natural variation in the raw materials comprising each glaze. It can take dozens of trials and test firings to reach the desired result.

Figure 2: Manufacturer's glaze library.
In larger facilities, glaze trials are done using a small test kiln before ramping up to full production in kilns large enough to hold a car (or several). The manufacturer in these facilities must be cognizant of how moving to the production kiln affects a glaze. When firing pieces from multiple projects in the same kiln, the manufacturer must also be careful that the gasses released from one glaze do not affect another glaze. The same is true when multiple glaze colors are used in the same piece.
Application of the glaze and understanding its behavior when heated to a molten state can be other critical factors. Historic glazes were often applied by hand. Today, manufacturers may prefer spray or other application methods in the interest of reducing production costs. However, these modern methods may not be able to replicate the inconsistencies and resulting character of hand application. Elaborate terra cotta pieces with relief carved ornament can allow molten glazes to run off of high points and pool in low points, resulting in a fired piece with dramatic tonal variation.
Sorting through all of the variables to get the right glaze is a time-consuming job. Before firing, the wet clay shapes must be air-dried for days to remove excess moisture that can cause pieces to crack or even explode in the kiln. In some processes, the clay is fired before and after the glaze is applied. Each round of glaze trials can take a week or more to fire as temperatures must be slowly brought up to around 1800°F before gradually returning to room temperature. Only then can the finished product be evaluated. Little can be done to speed up this ancient process. Working with an experienced manufacturer can help. In a time crunch, it can also be helpful to create large trial batches to cover a wide range of variables in one go. Ultimately, your best hope is to start as soon as you can and to leave plenty of time to get it right.

Figure 3: The fourth round of color trials finally nearing a match for this leaded Arts & Crafts Style glaze (image top).